There’s something surprisingly frustrating about a rear-view mirror falling off, usually at the worst possible moment. One minute you’re driving comfortably, and the next, your mirror is dangling or sitting in your lap.
I’ve been there, and if you’re reading this, chances are you are too. The good news? Reattaching the rear-view mirror is one of the easiest and most affordable DIY car fixes you can do at home no need to rush to a mechanic or spend a lot of money. 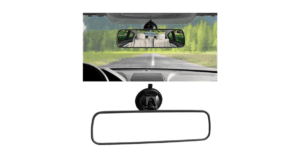 With the right adhesive and a bit of patience, you can get it back in place securely, often stronger than before. In this guide, I’ll walk you through everything from step-by-step instructions to common mistakes, product comparisons, and a buyer’s guide to help you choose the best mirror adhesive.
Whether you’re a beginner or someone who likes working on your own car, this article will make the process simple and stress-free.
What Causes a Rear View Mirror to Fall Off?
Before fixing it, it helps to understand why it fell in the first place:
- Heat damage (especially in hot climates)
- Old or degraded adhesive
- Improper previous installation
- Excessive force or vibration
- Cheap adhesive kits
In my experience, heat is the biggest culprit, especially if your car sits in the sun for hours.
Step-by-Step: How To Reattach the Rear View Mirror
Tools & Materials Needed
- Rear view mirror adhesive kit
- Razor blade or scraper
- Glass cleaner or rubbing alcohol
- Clean cloth or paper towel
- Marker (optional)
Step 1: Remove Old Adhesive
This is the most important step.
- Use a razor blade to scrape off old glue from the windshield
- Clean the mounting button (the metal piece behind the mirror)
👉 If you skip this, the new adhesive won’t bond properly.
Step 2: Clean the Surface
- Use alcohol or glass cleaner
- Make sure the area is completely dry and grease-free
Step 3: Mark the Position
- Use a marker or tape to mark where the mirror was originally placed
- This ensures correct positioning
Step 4: Apply Adhesive
- Follow the instructions on the adhesive kit
- Usually involves:
- Applying the activator to the glass
- Applying glue to the metal tab
Step 5: Attach the Mounting Button First
- Press the metal tab onto the windshield
- Hold for 30–60 seconds
⚠️ Don’t attach the mirror yet.
Step 6: Let It Cure
- Wait at least 15–30 minutes (or as instructed)
- Some adhesives require 24 hours for full strength
Step 7: Reattach the Mirror
- Slide or screw the mirror back onto the mount
- Ensure it’s secure and aligned
Comparison Table: Popular Rear View Mirror Adhesives
| Product Type | Strength Level | Drying Time | Ease of Use | Best For |
| Two-Part Adhesive Kit | Very High | Medium | Moderate | Long-term durability |
| Single Liquid Adhesive | Medium | Fast | Easy | Quick fixes |
| Gel-Based Adhesive | High | Medium | Easy | Beginners |
| OEM-Style Professional | Very High | Slow | Hard | Professional-level repairs |
💡 My Take: Two-part adhesive kits are the most reliable. I’ve tried quick fixes before—they rarely last in hot weather.
Honest Personal Review (From Experience)
After trying multiple adhesives over the years, here’s what I’ve learned:
- Cheap adhesives fail within weeks
- Proper surface prep is everything
- Rushing the curing time leads to failure
- Heat resistance matters more than drying speed
The first time I reattached my mirror, I didn’t clean the surface properly it fell off again within two days. The second time, I followed every step carefully, and it lasted for years.
👉 Lesson learned: don’t rush this job.
Common Mistakes to Avoid
1. Skipping Surface Cleaning
This is the #1 reason repairs fail.
2. Using Household Glue
Super glue or epoxy isn’t designed for glass, metal, or heat.
3. Attaching Mirror Too Soon
Let the mouth heal first.
4. Doing It in Cold Weather
Adhesives bond best in moderate temperatures.
5. Not Removing Old Glue Completely
Old residue weakens the new bond.
Buyer’s Guide: Choosing the Best Rear View Mirror Adhesive
1. Heat Resistance
If you live in a hot climate, choose a high-temperature-resistant adhesive.
2. Cure Time
- Fast cure = convenient
- Slow cure = stronger bond
3. Ease of Use
Beginners should go for gel-based or pre-measured kits.
4. Compatibility
Ensure it’s specifically labeled for rear-view mirrors.
5. Brand Reliability
Trusted brands usually offer better bonding strength.
Signs You Need a New Adhesive Kit
- The mirror falls off repeatedly
- The adhesive looks dry or cracked
- Mirror vibrates while driving
- Glue turns yellow or brittle
Can You Drive Without a Rear View Mirror?
Technically, yes, in some places, but it’s unsafe and often illegal. You lose:
- Rear visibility
- Situational awareness
- Safe lane-changing ability
👉 Fix it as soon as possible.
DIY vs Professional Repair
| Factor | DIY Repair | Professional Repair |
| Cost | Low | Higher |
| Time | 30–60 mins | 1–2 hours |
| Difficulty | Easy | None for you |
| Reliability | High (if done right) | Very high |
💡 Honestly, this is one repair I always recommend doing yourself.
Long Detailed Expansion (Deep Dive)
Reattaching a rear-view mirror might seem like a minor fix, but it’s actually a task that combines chemistry, surface preparation, and proper timing.
The adhesive used is specially designed to bond metal to glass under temperature fluctuations and constant vibration. Modern adhesive kits often use a two-step system:
- Activator – prepares the glass surface
- Adhesive resin – creates the bond
This chemical reaction forms a strong molecular connection that withstands heat, cold, and movement.
One key factor many people overlook is thermal expansion. Glass and metal expand at different rates when exposed to heat. Cheap adhesives can’t handle this difference, which leads to failure.
Another overlooked factor is humidity. High humidity can interfere with curing, especially in tropical climates. If possible, perform the repair in a dry environment.
Pro Tips (From Experience)
- Repair in the morning or evening (avoid midday heat)
- Use a fresh razor blade for cleaning
- Don’t touch cleaned surfaces with your fingers
- Apply firm, even pressure when mounting
- Wait longer than recommended if unsure
Read More: What Does An O2 Sensor Do In A Car
FAQs: How To Reattach Rear View Mirror
1. How long does it take to reattach a rear-view mirror?
Usually 30–60 minutes, but full curing can take up to 24 hours.
2. Can I use super glue?
No. It won’t withstand heat and vibration.
3. Why does my mirror keep falling off?
Poor surface prep or low-quality adhesive.
4. Is it safe to drive right after fixing?
You can drive, but avoid attaching the mirror until the adhesive cures.
5. What temperature is best for installation?
Between 10°C and 30°C (50°F–86°F).
6. Can I reuse old adhesive?
No. Always remove it completely.
7. Do all mirrors use the same adhesive?
Most do, but always check compatibility.
Final Thoughts
Reattaching a rear-view mirror is one of those repairs that feels intimidating at first, but once you do it, you realize how simple it really is. With the right adhesive and proper preparation, you can fix it yourself in under an hour and save money.
From my own experience, the key is patience. Don’t rush the steps, and don’t cut corners. Do it right once, and you won’t have to worry about it again for years.


