Most drivers know that engine oil is important, but surprisingly few people actually know how to check the dipstick properly. I used to be one of them.
The first time I opened my car’s hood, I stared at the engine for several minutes, trying to figure out which handle was the dipstick. When I finally found it, I pulled it out, saw oil smeared everywhere, and became even more confused.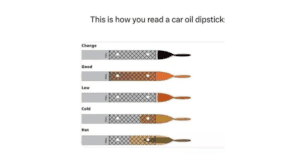 After years of owning vehicles and learning basic maintenance, I realized that checking engine oil is one of the easiest and most valuable habits a car owner can develop. It takes less than five minutes and can potentially save thousands of dollars in repair costs.
This guide explains everything in a simple and practical way so even complete beginners can confidently check their vehicle’s dipstick.
Why Checking the Dipstick Matters
Engine oil acts as the lifeblood of your vehicle. It lubricates moving parts, reduces friction, removes heat, and prevents excessive wear. Low oil levels can lead to:
- Increased engine wear
- Reduced fuel efficiency
- Engine overheating
- Costly mechanical failures
- Complete engine seizure in severe cases
Checking the dipstick regularly helps you catch problems before they become serious.
What Is a Dipstick?
A dipstick is a long metal or plastic rod inserted into the engine’s oil reservoir. It allows you to visually inspect:
- The current oil level
- The condition of the oil
- Potential contamination issues
Most dipsticks have colored handles, often yellow, orange, or red, making them easier to locate.
Step-by-Step: How To Check The Dipstick Properly
Step 1: Park on Level Ground
This is extremely important.
If your vehicle is parked on a slope, the oil can shift inside the oil pan, leading to inaccurate readings.
A flat driveway or parking lot works best.
Step 2: Turn Off the Engine
For most vehicles, wait approximately 5–10 minutes after shutting off the engine.
This gives the oil enough time to drain back into the oil pan.
Checking immediately after driving may show an artificially low oil level.
Step 3: Open the Hood
Locate the hood release lever inside your vehicle.
Raise the hood and secure it with the support rod if necessary.
Step 4: Find the Dipstick
Look for a small loop or handle, usually brightly colored.
The owner’s manual can help if you are unsure.
Step 5: Pull Out the Dipstick
Carefully remove the dipstick.
The first reading is usually inaccurate because oil may have splashed during driving.
Step 6: Wipe It Clean
Use:
- Paper towels
- A clean rag
- Microfiber cloth
Remove all oil from the dipstick.
Step 7: Reinsert Completely
Push the dipstick back into its tube until fully seated.
This is the step many beginners forget.
Step 8: Pull It Out Again and Read the Level
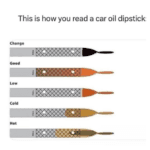
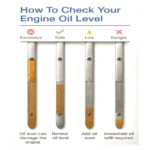
Now inspect the oil. Most dipsticks have markings such as:
- MIN and MAX
- LOW and FULL
- Two holes
- Crosshatched area
The oil should generally sit close to the FULL mark.
Understanding Dipstick Readings
| Oil Level | Meaning | Action Needed |
| Below MIN | Oil dangerously low | Add oil immediately |
| Middle Range | Acceptable | Monitor regularly |
| Near FULL | Ideal level | No action required |
| Above FULL | Overfilled | Drain excess oil if necessary |
How the Oil Should Look
Oil condition can reveal a lot about engine health.
Healthy Oil
- Amber or light brown
- Smooth texture
- No unusual smell
Dirty Oil
- Very dark black color
- Thick consistency
- Burnt odor
Contaminated Oil
- Milky appearance
- Presence of metal particles
- Foamy texture
These signs may indicate mechanical issues requiring professional inspection.
Personal Review: Why I Started Checking Oil Monthly
I learned this lesson the hard way. A previous car of mine developed a minor oil leak that went unnoticed for months. I assumed modern cars would simply warn me if something was wrong.
The warning light finally appeared, but by then the engine had already suffered additional wear. Since then, I have checked the dipstick once every month and before long road trips.
It takes only a few minutes and provides peace of mind. In my experience, this simple habit is one of the easiest ways to extend engine life.
Common Mistakes People Make
1. Checking Immediately After Driving
The oil hasn’t settled yet.
Result: falsely low readings.
2. Not Wiping the Dipstick First
This often confuses because oil splashes create misleading marks.
3. Checking on a Slope
Uneven surfaces distort oil levels.
4. Misidentifying Transmission Dipsticks
Older vehicles sometimes have multiple dipsticks.
Always verify using the owner’s manual.
5. Adding Too Much Oil
Overfilling can be nearly as harmful as running low. Too much oil may cause:
- Excessive pressure
- Foaming
- Seal damage
- Reduced performance
Comparison Table: Correct vs Incorrect Dipstick Checking
| Correct Method | Incorrect Method |
| Park on level ground | Park on a hill |
| Wait 5–10 minutes after driving | Check immediately after shutting the engine off |
| Wipe the dipstick clean first | Read the first pull |
| Fully reinsert the dipstick | Partially insert the dipstick |
| Use proper engine oil if topping up | Add random oil types |
Signs You Should Check Oil Immediately
You shouldn’t wait for your next maintenance schedule if you notice:
- Oil warning light
- Burning oil smell
- Engine knocking noises
- Excess exhaust smoke
- Reduced engine performance
- Visible oil leaks
These symptoms may indicate low oil levels.
Dipstick Types Comparison
| Type | Common Vehicles | Ease of Reading | Notes |
| Hole Markers | Older cars | Moderate | Uses two drilled holes |
| Crosshatched | Most modern cars | Easy | Provides a clear range |
| Min-Max Labels | European vehicles | Very Easy | Easy for beginners |
| Electronic Sensors | Some luxury vehicles | Easiest | No physical dipstick |
Vehicles Without Traditional Dipsticks
Some newer vehicles rely entirely on electronic oil monitoring systems. While convenient, many experienced owners still prefer traditional dipsticks because they provide visual confirmation.
Electronic systems can occasionally produce delayed readings or sensor-related issues.
How Often Should You Check the Dipstick?
A good rule of thumb:
| Driving Type | Recommended Check Interval |
| Daily commuting | Once per month |
| Older vehicles | Every 2 weeks |
| High-mileage engines | Weekly |
| Before road trips | Always |
| After repairs | Within a few days |
Buyer’s Guide: What You Need for Checking Engine Oil
Checking a dipstick requires very little equipment, but a few items can make the process easier.
1. Microfiber Cloth
A reusable microfiber towel is ideal for cleaning the dipstick.
Benefits:
- Absorbs oil well
- Reusable
- Leaves minimal lint
2. Disposable Gloves
Useful if you dislike getting oil on your hands.
Benefits:
- Cleaner maintenance process
- Better grip
- Protects skin
3. Flashlight
Helpful in poorly lit garages.
Benefits:
- Easier identification of the oil level
- Better visibility in crowded engine bays
4. Funnel
If topping up oil becomes necessary, a funnel prevents spills.
Benefits:
- Cleaner oil additions
- Reduces waste
- Prevents engine bay mess
5. Vehicle Owner’s Manual
Often overlooked but extremely useful. It provides:
- Dipstick location
- Oil capacity
- Recommended oil grade
- Service intervals
Tips for Beginners
Here are some habits I personally recommend:
Make It Monthly
Check the oil on the first weekend of every month.
Check Before Long Trips
Long highway drives place additional stress on engines.
Keep Extra Oil Available
Having one bottle of approved oil in the garage can save time.
Record Oil Consumption
If your car consistently loses oil, there may be a leak or an internal engine issue.
Read More: What Is an Accumulator in an Electric Car? Complete Guide for EV Owners
FAQs: How To Check The Dipstick
1. Should I check the dipstick when the engine is hot or cold?
Ideally, check after the engine has been turned off for about 5–10 minutes so the oil can settle.
2. How often should I check my engine oil?
Most vehicles benefit from monthly checks, while older cars may require more frequent inspections.
3. Why does my dipstick show different readings every time?
This usually happens because:
- The vehicle isn’t level.
- The oil hasn’t settled.
- The dipstick wasn’t wiped before checking.
4. Is dark oil always bad?
Not necessarily. Modern oils darken as they clean the engine. However, extremely thick, burnt, or contaminated oil should be inspected.
5. Can too much oil damage the engine?
Yes. Overfilling may cause foaming, increased pressure, and seal damage.
6. What if there is no oil on the dipstick?
Do not continue driving. Add oil immediately and inspect for leaks or excessive oil consumption.
7. What does milky oil on the dipstick mean?
Milky oil may indicate coolant contamination, potentially caused by a head gasket issue.
8. Do electric vehicles have dipsticks?
Pure electric vehicles generally do not because they do not use traditional engine oil.
9. Can I use any oil to top off my engine?
No. Always use the oil grade recommended by your vehicle manufacturer.
10. Is an electronic oil monitor better than a dipstick?
Electronic systems are convenient, but many drivers still appreciate the accuracy and reassurance of a manual dipstick inspection.
Final Thoughts
Learning how to check the dipstick is one of the simplest automotive skills anyone can master. You don’t need special tools, mechanical experience, or technical knowledge.
In my experience, regular oil checks create confidence and help prevent expensive repairs. The entire process usually takes less than five minutes, yet it can significantly extend engine life.
Whether you own a brand-new vehicle or an older high-mileage car, checking the dipstick regularly is a habit worth developing.