A broken wing mirror glass can ruin your driving experience faster than most people expect. Whether someone clipped your car in a parking lot, the mirror cracked in winter, or the backing plate failed with age, replacing wing mirror glass is one of those repairs many drivers put off for too long.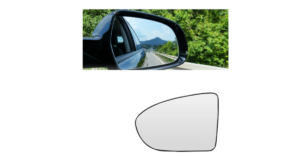 I used to think replacing mirror glass would require removing the entire side mirror assembly or paying a mechanic a ridiculous amount of money. Surprisingly, after doing it myself, I realized it’s one of the easier DIY car repairs you can handle at home.
The best part? Most wing mirror glass replacements take less than 30 minutes and cost a fraction of a dealership repair. In this detailed guide, I’ll walk you through:
- How wing mirror glass works
- When replacement is necessary
- Step-by-step replacement instructions
- Common mistakes to avoid
- Heated vs non-heated mirror glass
- Cost comparisons
- Buyer’s guide
- Professional tips
- Frequently asked questions
If you’ve never replaced wing mirror glass before, don’t worry. This guide keeps things simple, practical, and beginner-friendly.
What Is Wing Mirror Glass?
Wing mirror glass is the reflective component attached to your vehicle’s side mirror assembly. It helps drivers monitor surrounding traffic, blind spots, pedestrians, and parking distances.
Modern mirror glass may include:
- Heating elements
- Blind-spot indicators
- Auto-dimming technology
- Convex wide-angle surfaces
- Turn signal integration
The glass itself is usually attached to a plastic backing plate that clips into the mirror motor assembly.
Signs Your Wing Mirror Glass Needs Replacement
Here are the most common warning signs:
Cracked Glass
Even a small crack can distort visibility and become dangerous at night.
Loose Mirror
If the glass vibrates while driving, the backing clips may be damaged.
Discolored Reflection
Older mirrors sometimes develop dark spots or fading.
Heating Function Stops Working
Heated mirrors can fail due to damaged electrical connectors.
Missing Mirror Glass
Sometimes the entire glass falls out after impact or adhesive failure.
Wing Mirror Glass Replacement Cost Comparison
| Replacement Option | Average Cost | Difficulty Level | Best For |
| DIY Glass Only | $15–$60 | Easy | Budget-friendly repairs |
| OEM Mirror Glass | $40–$120 | Easy | Factory-quality fit |
| Aftermarket Glass | $15–$50 | Easy | Affordable replacement |
| Full Mirror Assembly | $100–$500 | Medium | Severe mirror damage |
| Professional Repair | $80–$250 | None | Convenience |
Can You Replace Just The Mirror Glass?
Yes, and in most cases, you should. Unless the mirror housing or motor assembly is damaged, replacing only the glass is usually the smartest option.
This saves:
- Money
- Installation time
- Paint matching hassle
- Electrical rewiring work
Tools You’ll Need
Most wing mirror glass replacements require only basic tools.
Basic Tools Checklist
- Plastic trim removal tool
- Flathead screwdriver
- Gloves
- Safety glasses
- Cleaning cloth
- Adhesive pads (if required)
Optional:
- Hair dryer or heat gun
- Electrical contact cleaner
- Replacement backing clips
Choosing The Correct Replacement Mirror Glass
Before ordering replacement glass, verify:
Vehicle Make And Model
Even small trim differences matter.
Driver Side vs Passenger Side
They are not interchangeable.
Heated or Non-Heated
Heated mirrors include electrical terminals.
Convex vs Flat Glass
Convex mirrors provide wider visibility.
Blind Spot Features
Some mirrors include integrated warning systems.
OEM vs Aftermarket Mirror Glass
OEM Mirror Glass
Pros:
- Perfect fit
- Factory quality
- Better durability
- Correct tint and curvature
Cons:
- More expensive
Aftermarket Mirror Glass
Pros:
- Affordable
- Widely available
- Good for older vehicles
Cons:
- Fitment can vary
- Heating connectors may differ
- Sometimes weaker adhesive
Personally, I’ve had mixed experiences with aftermarket mirror glass. Some fit perfectly, while others rattled slightly at highway speeds. For daily drivers, OEM quality is often worth the extra money.
Step-By-Step: How To Replace Wing Mirror Glass
Now let’s get into the actual process.
Step 1: Inspect The Mirror Assembly
Before removing anything, inspect:
- Mirror housing condition
- Power adjustment function
- Heating connector condition
- Motor movement
If the entire mirror assembly is cracked, replacing only the glass may not solve the issue.
Step 2: Tilt The Mirror Inward
Use the mirror adjustment controls to tilt the glass inward. This creates a gap so you can access the clips behind the mirror. If the motor no longer works, gently push the mirror by hand.
Step 3: Remove The Old Mirror Glass
This step requires patience. Most mirror glass pieces are attached using:
- Clip-in backing plates
- Adhesive pads
- Retaining rings
Clip-On Mirrors
Use a trim tool behind the glass and carefully pry outward. You’ll usually hear the clips release.
Adhesive Mirrors
Warm the adhesive slightly using a hair dryer.
Then slowly peel the glass away.
Avoid excessive force because broken glass can shatter easily.
Step 4: Disconnect Heated Mirror Wires
If your vehicle has heated mirrors, disconnect the electrical terminals carefully.
Do not yank the wires.
Use needle-nose pliers if necessary.
Step 5: Clean The Mirror Housing
This step is important but often skipped.
Remove:
- Broken glass fragments
- Old adhesive residue
- Dirt and moisture
A clean surface improves installation quality.
Step 6: Install The New Mirror Glass
For Clip-On Mirrors
Align the backing plate carefully with the motor assembly. Press evenly until the clips snap into place.
For Adhesive Mirrors
Apply new adhesive pads or automotive mirror adhesive.
Press firmly for 30–60 seconds.
Step 7: Reconnect Heated Mirror Wires
Reconnect the electrical terminals exactly as they were removed.
Loose connections can cause heating failure later.
Step 8: Test Mirror Functions
Check:
- Mirror adjustment movement
- Heating function
- Stability at idle
- Visibility alignment
If the mirror vibrates excessively, remove and reinstall it carefully.
Common Problems During Replacement
Broken Plastic Clips
Older clips become brittle over time.
Sometimes replacing the backing plate is necessary.
Incorrect Mirror Curvature
Cheap aftermarket mirrors may distort distance perception.
Heating Element Failure
Improper wiring connections can stop heated mirrors from working.
Loose Fitment
Poor adhesive quality or incorrect clips cause vibration.
Heated Wing Mirror Glass Explained
Heated mirrors help remove:
- Frost
- Snow
- Condensation
- Rain buildup
They work using thin electrical heating elements behind the glass. Most heated mirrors activate automatically with the rear defroster.
Are Heated Mirrors Worth It?
Absolutely especially in colder climates. Benefits include:
- Faster visibility restoration
- Improved winter safety
- Reduced fogging
- Better nighttime driving visibility
After using heated mirrors during rainy mornings, it’s hard to go back to non-heated versions.
Convex vs Flat Mirror Glass
Convex Mirrors
Advantages:
- Wider field of vision
- Reduced blind spots
- Better highway awareness
Disadvantages:
- Objects appear smaller
Flat Mirrors
Advantages:
- Accurate distance perception
Disadvantages:
- Narrower viewing angle
Most passenger-side mirrors are convex by design.
DIY vs Professional Installation
| Factor | DIY Replacement | Professional Repair |
| Cost | Low | Higher |
| Time | 20–45 minutes | 1–2 hours |
| Skill Required | Basic | None |
| Risk Of Damage | Moderate | Low |
| Satisfaction | High | Medium |
For most drivers, DIY replacement is realistic and rewarding.
My Personal Experience Replacing Wing Mirror Glass
The first time I replaced wing mirror glass, I expected disaster.
I imagined:
- Broken clips
- Electrical problems
- Misaligned mirrors
- Shattered glass everywhere
Instead, the process was surprisingly simple. The biggest lesson I learned was not to rush removal. Most damage happens when people force the old mirror off too aggressively.
Another important discovery: cheaper aftermarket mirrors sometimes look slightly different from factory glass. One replacement I bought had a slightly darker tint and weaker heating performance.
Since then, I usually recommend mid-range or OEM-quality replacements for long-term reliability.
How Long Does Wing Mirror Glass Last?
Most mirror glass lasts:
- 8–15 years
- Sometimes longer with careful maintenance
Factors affecting lifespan include:
- Weather exposure
- Car washes
- Parking conditions
- Impact damage
- Heating cycles
How To Prevent Future Mirror Damage
Fold Mirrors When Parking
Especially in narrow streets.
Avoid Automatic Car Wash Contact
Some brushes hit mirrors aggressively.
Remove Ice Carefully
Never scrape aggressively with metal tools.
Use Mirror Covers In Winter
Helpful in extreme climates.
Best Places To Buy Replacement Wing Mirror Glass
Dealerships
Best fit and quality.
Auto Parts Stores
Quick local availability.
Online Retailers
Usually, the cheapest option.
Salvage Yards
Great for older vehicles.
Buyer’s Guide: Choosing The Best Wing Mirror Glass
Here’s what actually matters when shopping for replacement mirror glass.
1. Correct Fitment
Always confirm:
- Year
- Make
- Model
- Trim level
Incorrect fitment is the number one problem buyers face.
2. Heating Compatibility
If your original mirror was heated, buy heated replacement glass. Otherwise, you’ll lose functionality.
3. Backing Plate Included
Some products include only the glass. Others include:
- Glass
- Backing plate
- Clips
- Adhesive
Complete kits simplify installation.
4. OEM Quality
Higher-quality mirrors usually offer:
- Better visibility
- Proper curvature
- Stronger mounting
- Longer lifespan
5. Anti-Glare Features
Some premium mirrors reduce headlight glare at night. Useful for highway drivers.
6. Blind Spot Integration
Modern vehicles may include:
- Blind spot sensors
- Warning lights
- Camera systems
Always verify compatibility.
7. Warranty Coverage
Good manufacturers often provide:
- 1-year warranty
- Fitment guarantee
- Defect protection
Common Mistakes To Avoid
Buying Universal Mirror Glass
Universal mirrors rarely fit perfectly.
Ignoring Heated Functions
Many buyers accidentally order non-heated replacements.
Using Cheap Adhesive
Poor adhesive causes vibration and detachment.
Pulling Too Hard During Removal
This often breaks the motor plate underneath.
Safety Tips During Installation
- Wear gloves
- Protect your eyes
- Handle broken glass carefully
- Disconnect the battery if working with complex electronics
- Avoid excessive force
Environmental Benefits Of Glass-Only Replacement
Replacing only the glass instead of the entire mirror assembly reduces:
- Plastic waste
- Manufacturing demand
- Repair costs
- Paint usage
It’s a surprisingly eco-friendly repair.
When You Should Replace The Entire Mirror Assembly
Replace the full assembly if you notice:
- Broken housing
- Motor failure
- Severe impact damage
- Loose mounting
- Internal wiring damage
Is Wing Mirror Glass Replacement Easy For Beginners?
Yes. In fact, it’s one of the best beginner automotive DIY projects because:
- Minimal tools required
- Low repair cost
- Fast installation
- Easy learning curve
Most people can finish the job in under 30 minutes.
Read More: Retainers For Car Door Trim | My Honest Review
FAQs: How To Replace Wing Mirror Glass
Can I replace the wing mirror glass myself?
Yes. Most vehicles allow simple glass-only replacement using basic tools.
How much does wing mirror glass replacement cost?
DIY replacement usually costs between $15 and $60, while professional repairs may exceed $200.
Is heated mirror glass harder to replace?
Not significantly. You simply disconnect and reconnect two small electrical terminals.
Can I drive with a cracked wing mirror glass?
Technically, yes, in some areas, but it’s unsafe and may violate road regulations depending on local laws.
How long does mirror replacement take?
Most replacements take 20–45 minutes.
Will the aftermarket mirror glass fit correctly?
Quality varies. Premium aftermarket products usually fit well, while cheap versions may vibrate or distort reflections.
Do I need special adhesive?
Only if your mirror uses adhesive mounting. Many replacements already include adhesive pads.
Why is my new mirror vibrating?
Possible causes include:
- Loose clips
- Poor adhesive
- Incorrect backing plate alignment
Can I replace just the glass and not the whole mirror?
Yes, and that’s usually the most cost-effective solution.
What causes wing mirror glass to fall off?
Common causes include:
- Old adhesive failure
- Broken clips
- Heat exposure
- Impact damage
- Vibration over time
Final Thoughts
Replacing wing mirror glass is one of those repairs that sounds intimidating until you actually do it.
Once you understand how the clips, backing plate, and heating connectors work, the process becomes surprisingly straightforward. The key points are simple:
- Buy the correct replacement
- Remove the old glass carefully
- Clean the mounting surface properly
- Avoid rushing the installation
For most drivers, DIY replacement saves money while restoring visibility and safety almost immediately.
Whether you choose OEM or aftermarket glass, taking the time to install it correctly makes a huge difference in long-term durability and driving confidence.


