Replacing a rear-view mirror might sound like a complicated car repair, but in many cases, it’s actually one of the easiest fixes you can do yourself. I learned this firsthand when my rear-view mirror suddenly became loose and started vibrating every time I drove.
At first, I assumed it would require a mechanic visit, but after a little research, I realized it’s often a quick DIY job that can take less than 30 minutes. Your rear view mirror plays a critical role in safe driving.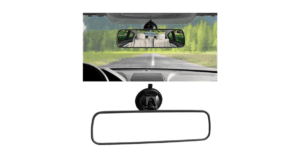 It helps you monitor-view behind your vehicle, change lanes safely, and maintain awareness on the road. When the mirror becomes damaged, loose, or falls off the windshield, replacing it quickly is essential.
In this detailed guide, we’ll walk through how to replace a rear-view mirror step-by-step, what tools you’ll need, the types of mirrors available, and how to choose the best replacement.
Whether your mirror broke, fell off the windshield, or needs an upgrade, this article will help you handle the job confidently.
Rear View Mirror Replacement Overview
Before diving into the process, it helps to understand the typical steps and requirements.
| Step | Description | Difficulty |
| Remove the old mirror | Detach mirror from windshield mount | Easy |
| Clean windshield mount area | Remove adhesithe ve residue | Ethe asy |
| Install mounting button | Attach metal mount with adhesive | Moderate |
| Attach the new mithe rror | Slide or screw the mirror into the mount | Easy |
| Adjust mirror position | Set correct driving angle | Very Easy |
Most of the rear-view mirror replacements take 10 to 30 minutes, depending on the type of mirror.
Types of Rear View Mirrors
Not all rear view mirrors are the same. Some are simple manual mirrors, while othersrear-viewtechnology like cameras and sensors.
| Mirror Type | Features | Average Cost |
| Basic Manual Mirror | Standard reflection mirror | $10 – $30 |
| Day/Night Mirror | Reduces glare from headlights | $20 – $50 |
| Auto-Dimming Mirror | Automatically adjusts brightness | $50 – $150 |
| Smart Mirror | Camera display and advanced features | $150 – $400 |
If your original mirror had extra features like auto-dimming or a compass display, make sure your replacement mirror supports them.
Signs Your Rear View Mirror Needs Replacement
Sometimes mirrors just fall off, but there are other signs that replacement is needed.
1. Mirror Fell Off Windshield
A common problem caused by weak adhesive or extreme heat.
2. Loose or Vibrating Mirror
If the mirror shakes while driving, the mount may be worn out.
3. Cracked or Damaged Mirror Glass
This reduces visibility and should be replaced immediately.
4. Broken Mounting Bracket
The metal mounting button may become damaged.
5. Faulty Auto-Dimming Feature
If the mirror no longer reduces glare at night, the electronics may have failed.
Tools Needed to Replace a Rear View Mirror
Most rear-view mirror replacements require only a few simple tools. Common tools include:
- Screwdriver
- Rear view mirror adhesive kit
- Razor blade or scraper
- Glass cleaner
- Marker or tape
A mirror adhesive kit is especially important because regular glue usually won’t hold properly on glass.
Step-By-Step: How To Replace Rear View Mirror
Let’s go through the process in detail.
Step 1: Remove the Old Rear View Mirror
Start by removing the broken or loose mirror. Most mirrors attach in one of three ways:
- Set screw mount
- Twist-on mount
- Clip mount
Use a screwdriver to loosen the set screw if necessary. Then gently slide the mirror upward or twist it off the mounting button. Be careful not to apply too much force, especially if the windshield mount is still attached.
Step 2: Remove the Old Mounting Button
If the mirror mount is still stuck to the windshield but damaged, it needs to be removed. Use a razor blade or scraper to carefully remove the metal button and old adhesive. Take your time during this step to avoid scratching the glass.
Step 3: Clean the Windshield Surface
Proper cleaning is critical for strong adhesion. Use:
- Glass cleaner
- Rubbing alcohol
- Lint-free cloth
Make sure the surface is completely clean, dry, and free of old adhesive. Any dirt or grease can prevent the new mount from sticking.
Step 4: Attach the Mounting Button
Most replacement kits include a metal mounting button and adhesive. Apply the adhesive to the button and press it firmly against the windshield. Important tips:
- Mark the correct position before installing
- Hold the button in place for 30–60 seconds
- Allow adhesive to cure for 15–30 minutes
Some adhesives require up to 24 hours for full strength.
Step 5: Install the New Rear View Mirror
Once the mounting button is secure, attach the new mirror. Depending on the mirror type:
- Slide the mirror onto the mount
- Twist into place
- Tighten the set screw
Make sure the mirror is firmly attached.
Step 6: Adjust the Mirror Position
Finally, adjust the mirror for proper visibility. The mirror should allow you to see:
- The entire rear windshield
- Traffic behind your vehicle
- Minimal interior reflection
Correct adjustment improves driving safety and awareness.
Rear View Mirror Replacement Cost
If you prefer professional installation, here’s what you can expect to pay.
| Replacement Type | Average Cost |
| DIY Replacement | $15 – $60 |
| Mechanic Installation | $50 – $120 |
| Smart Mirror Installation | $150 – $400 |
Doing it yourself can save $50 or more in labor costs.
Common Mistakes When Replacing a Rear View Mirror
Many DIY installers make small mistakes that cause the mirror to fall off again. Avoid these errors:
Installing on Dirty Glass
The adhesive won’t stick properly.
Not Waiting for Adhesive to Cure
Installing the mirror too early weakens the bond.
Using Regular Glue
Standard glue is not strong enough for mirrors.
Incorrect Mirror Position
Improper placement reduces rear visibility.
Buyer’s Guide: Choosing the Best Rear View Mirror
If you’re buying a replacement mirror, consider these factors.
1. Compatibility
Always match the mirror to your:
- Vehicle make
- Model
- Year
Some mirrors include specific mounting designs.
2. Mirror Features
Basic mirrors work well, but upgraded options provide extra convenience. Popular features include:
- Auto-dimming
- Built-in compass
- Temperature display
- Garage door opener
- Dash camera integration
Choose features that match your driving needs.
3. Build Quality
Look for mirrors made from:
- High-quality reflective glass
- Durable plastic housing
- Strong mounting brackets
Cheap mirrors may vibrate or distort reflections.
4. Installation Type
Some mirrors install easily while others require wiring. Choose:
- Plug-and-play mirrors for easy installation
- Wired mirrors if adding advanced features
5. Warranty
A good mirror should include at least a 1-year warranty. This ensures replacement if the mount or electronics fail.
How Long Does Rear View Mirror Replacement Take?
Most replacements take:
10 to 30 minutes
However, adhesive curing time may require waiting 30 minutes to several hours before driving.
Can You Drive Without a Rear View Mirror?
Technically, yes, in some areas, but it’s not recommended. Driving without a rear-view mirror reduces your ability to:
- Monitor traffic
- Change lanes safely
- Avoid collisions
Many regions also require at least two working mirrors by law.
Tips To Prevent Rear View Mirror Damage
Once your new mirror is installed, these tips can help it last longer.
- Avoid pulling or adjusting the mirror aggressively
- Protect the windshield from extreme heat
- Use proper cleaning products
- Check mirror tightness occasionally
These simple habits can keep your mirror secure for years.
Read More: How Much Are Car Rotors
FAQs: How To Replace the Rear View Mirror
How much does it cost to replace a rear-view mirror?
A basic replacement typically costs $15 to $60 for DIY or $50 to $120 with professional installation.
Can I glue my rear-view mirror back on?
Yes, but you must use special rear-view mirror adhesive, not regular glue.
Why did my rear-view mirror fall off?
Common causes include:
- Heat damage
- Old adhesive
- Improper installation
- Accidental impact
How long does mirror adhesive take to dry?
Most adhesives set within 15–30 minutes, but full curing can take 24 hours.
Can I replace a rear-view mirror myself?
Yes. Rear view mirror replacement is usually one of the easiest DIY car repairs.
Are auto-dimming mirrors worth it?
Yes, especially if you drive frequently at night. They reduce glare from headlights behind you.
Final Thoughts
Replacing a rear-view mirror may seem intimidating at first, but it’s actually a simple and affordable repair that most car owners can handle themselves. With the right adhesive and a little patience, you can install a new mirror in less than half an hour.
Whether you’re replacing a broken mirror or upgrading to a modern auto-dimming or smart mirror, taking the time to install it properly will improve both safety and driving comfort.
If your mirror has recently fallen off or become loose, don’t ignore the problem. A secure and properly adjusted rear-view mirror is essential for maintaining full awareness of the road behind you.


